Let’s make vibrant tissue paper pom poms together! First, pick lightweight, colorful tissue paper for fluffiness and charm. Cut even 1.5- to 2-inch strips, then fold them accordion-style to keep layers neat. Firmly secure the center with wire or string so everything holds tight. Trim the ends to soft points, then gently pull apart each layer to create fullness. These simple steps bring joyful, fluffy decorations to life, and exploring them further will reveal plenty of handy tips.
Quick Tips
- Select lightweight tissue paper in bright or pastel colors for vibrant, fluffy pom poms.
- Cut uniform 1.5 to 2-inch strips for even folding and balanced pom shape.
- Fold tissue paper accordion-style with 1 to 2-inch folds, keeping layers aligned for fullness.
- Secure the center tightly with floral wire or string to hold folds firmly in place.
- Trim edges round or pointed, then gently separate layers to create a voluminous, rounded pom pom.
Choose Tissue Paper Types and Colors for Pom Poms
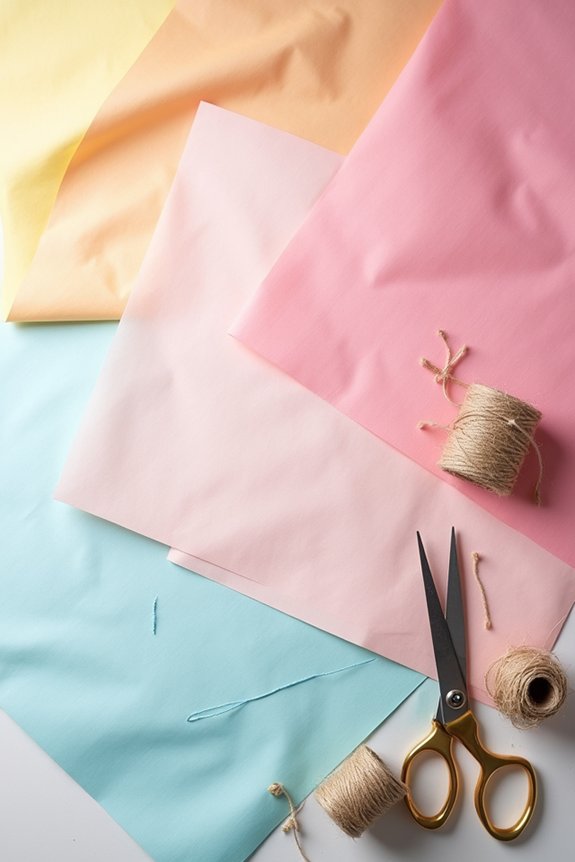
Although choosing tissue paper might seem simple, picking the right types and colors is key to creating stunning pom poms that truly stand out.
We want to choose lightweight tissue paper, as heavier types won’t fluff as nicely and can look bulky. Bright colors give a fun, lively feel, while pastels offer softness and elegance. Mixing complementary tones can create depth and beauty, so don’t hesitate to combine different shades.
Matte tissue provides a gentle look, while metallic or glittered papers add sparkle, perfect for festive occasions. Let’s focus on colors and textures that bring your vision to life effortlessly. Pairing your pom poms with other boho party decorations will enhance your overall celebration aesthetic.
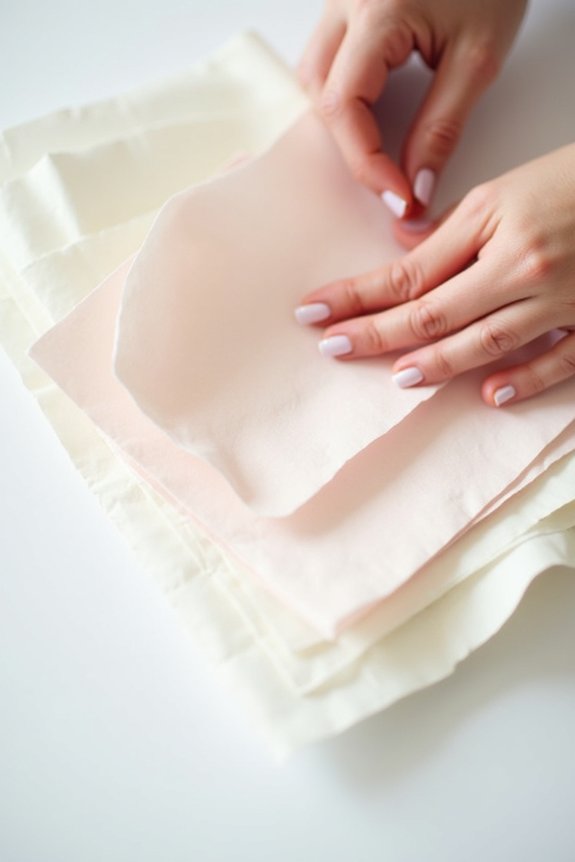
Cut Tissue Paper Into Even, Measured Strips
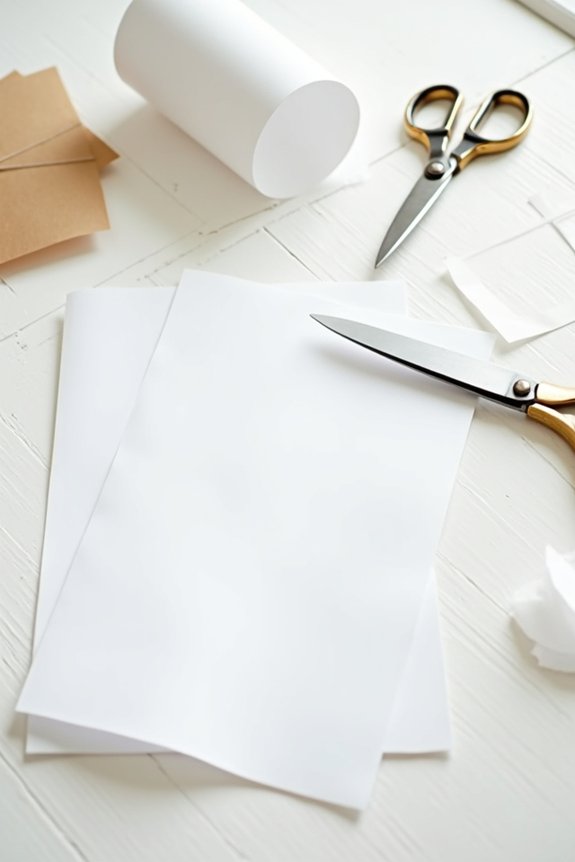
Once we’ve our tissue paper selected, the next step is to cut it into even, measured strips so our pom poms come out symmetrical and full.
Start by stacking the tissue paper sheets neatly to keep everything aligned.
Use a ruler to measure the width of each strip—usually around 1.5 to 2 inches works best.
Mark the measurements lightly with a pencil if needed, then carefully cut along the markings with sharp scissors.
Taking time in this step guarantees all strips are uniform, making the folding process smooth and resulting in a beautifully balanced pom pom.
For those looking to create multiple decorations, craft party decorations offer pre-cut tissue paper options that can streamline this process.
Fold the Tissue Paper Like an Accordion
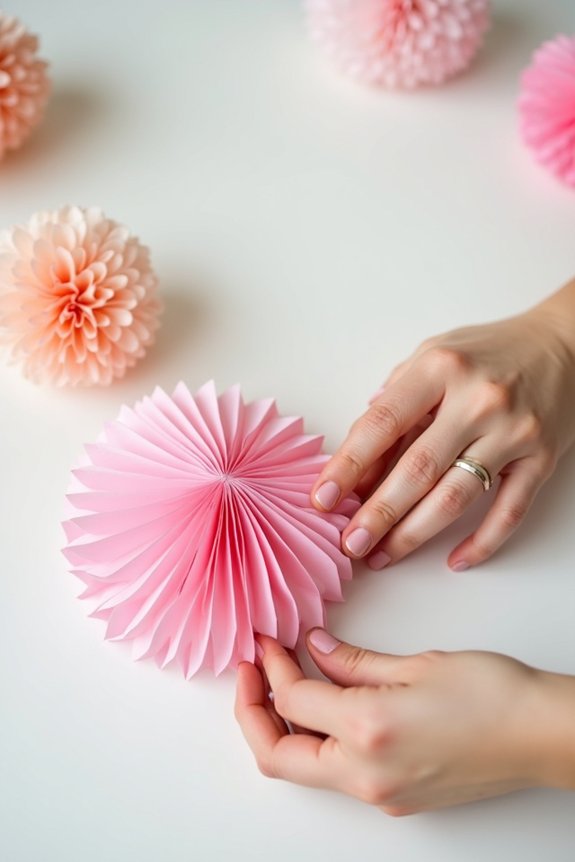
When we fold the tissue paper, think of it like creating an accordion, with each fold neatly stacking on top of the last.
Start at one short side and fold about one to two inches back and forth, making certain each fold is even and crisp. Keeping the layers aligned helps the pom pom look full and smooth later on.
If the strips are too wide, the folds can feel bulky, so aim for a comfortable width.
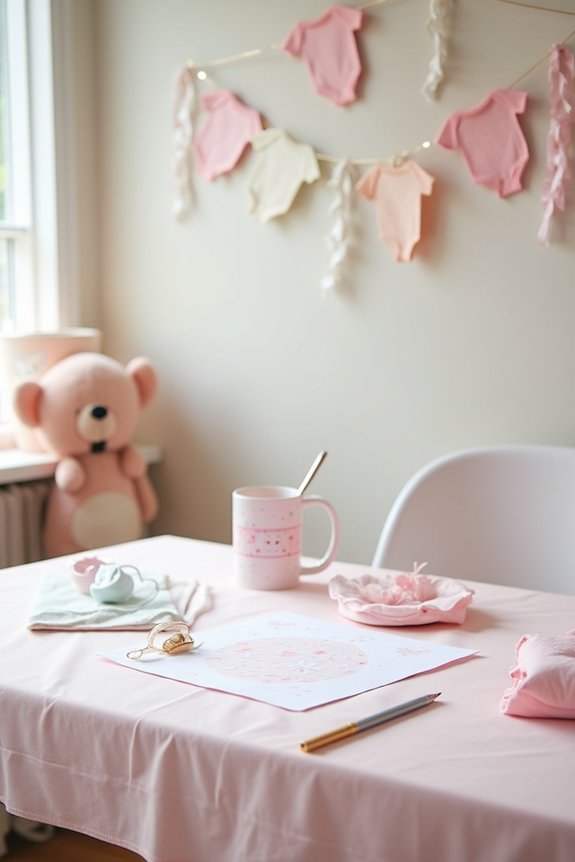
Taking our time to fold carefully guarantees the tissue paper holds its shape beautifully in the final decoration. Tissue paper pom poms are a versatile option among party decorations for creating an inviting atmosphere at your summer gathering.
Secure the Tissue Paper Center With Wire or String
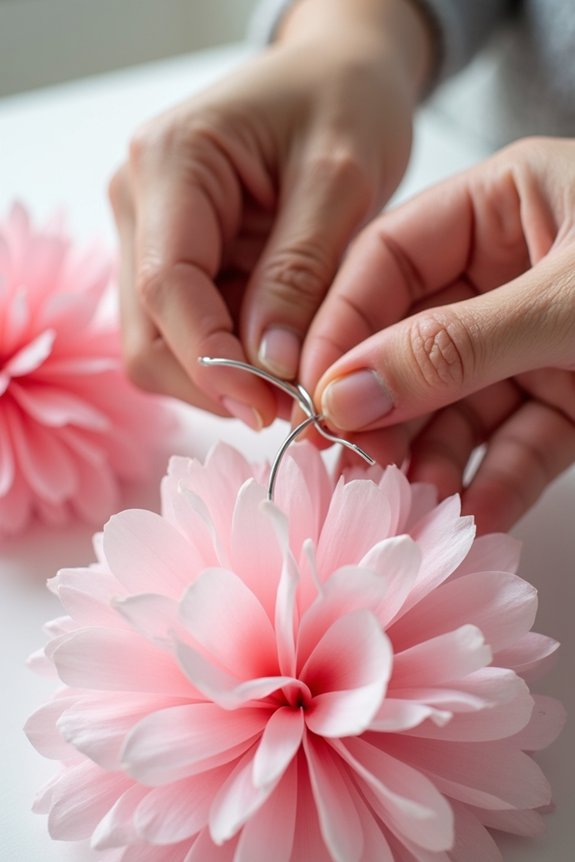
Before moving on to fluffing the pom pom, we need to secure the tissue paper at its center using wire or string.
This step holds the folds tightly together, preventing the layers from falling apart while we shape our beautiful pom pom. Take a thin piece of floral wire or a strong string, and wrap it around the middle of the folded tissue paper.
Twist the wire or tie the string firmly, but not so tight that the paper tears. Make sure the knot or twist is secure enough to keep everything in place as we move forward to the next step. These sleepover party decorations can instantly transform your space with vibrant color and texture once completed.
Trim Edges to Shape Fluffy Pom Poms
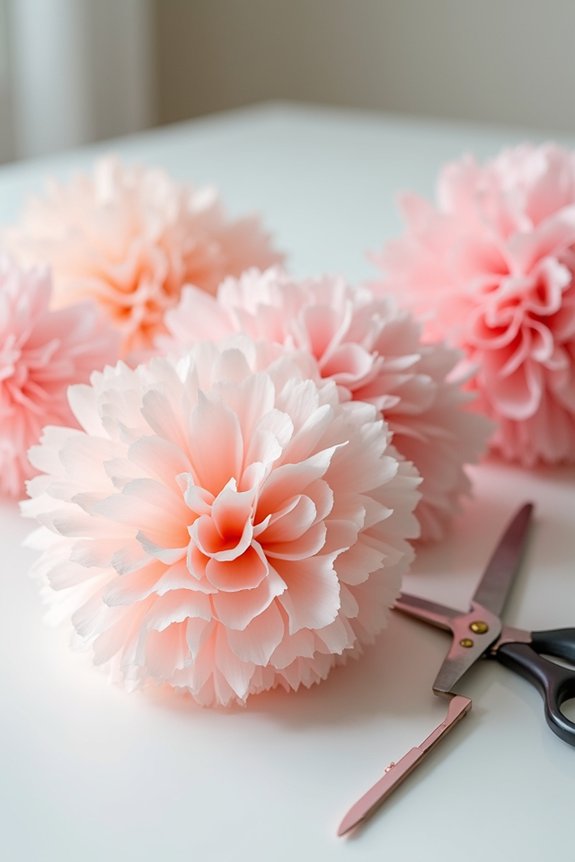
After securing the center, we’ll want to focus on trimming the edges to help shape our tissue paper pom poms into the perfect fluffy ball.
Using sharp scissors, carefully cut the tissue paper edges into soft points or rounded shapes rather than straight lines. This subtle shaping adds volume and prevents the pom poms from looking flat or boxy.
Take your time, trim evenly around the pom pom, and don’t worry if the cuts aren’t perfectly symmetrical. These gentle trims help create that lovely, airy look that makes tissue paper pom poms so charming and festive for any occasion. Pair these handmade pom poms with other garden party decorations to create a cohesive and elegant outdoor celebration.
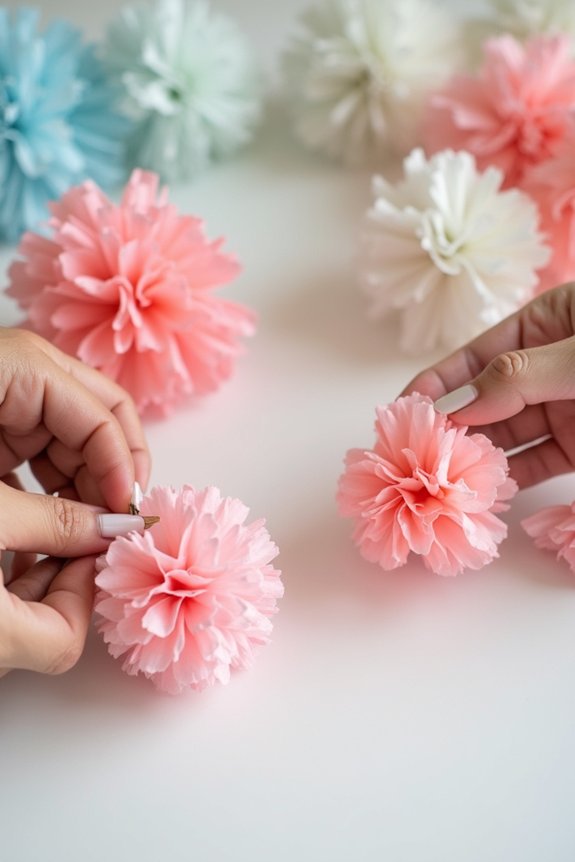
Separate Tissue Paper Layers Carefully for Fullness
Gently pulling apart each layer of tissue paper makes all the difference in creating a full, fluffy pom pom that catches the eye.
We need to work slowly and carefully, separating one sheet at a time to avoid tearing. Starting from one side, lift each layer gently, fluffing it outward to add volume.
The magic happens as all those thin sheets spread wide, building softness and depth. If we rush or pull too hard, the tissue can rip, leaving gaps.
Taking a few extra minutes to separate layers carefully guarantees our pom poms look beautifully round and inviting.
Hang and Display Your Tissue Paper Pom Poms Creatively
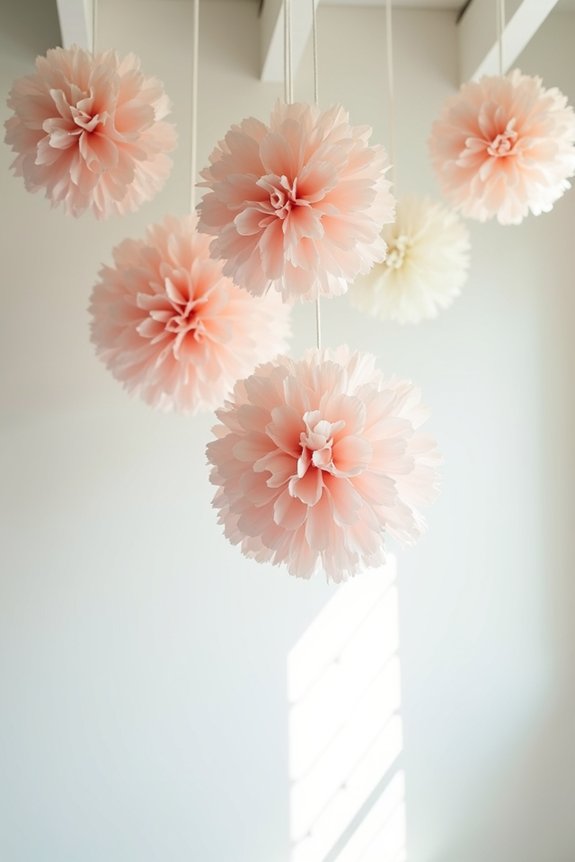
Where can we showcase these vibrant tissue paper pom poms to make the biggest impact?
Let’s try hanging them from the ceiling at varying heights to create a floating garden effect. Using clear fishing line or colorful ribbon makes them appear to drift in midair.
We can also attach pom poms to walls for lively backdrops, or string several together as garlands to dress up doorways and windows.
These displays bring instant charm to parties, bedrooms, or any cozy corner.
Frequently Asked Questions
How Long Do Tissue Paper Pom Poms Typically Last?
Tissue paper pom poms typically last around 1 to 2 weeks if kept indoors and away from moisture. We recommend handling them gently and storing them in a dry place to keep them looking fresh longer.
Can I Reuse Tissue Paper Pom Poms for Different Events?
We can think of tissue paper pom poms like cherished letters—they can be unfolded, fluffed, and reused, bringing joy to new celebrations. With gentle care, we’ll keep their charm alive for every special moment we share together.
What Is the Best Way to Store Pom Poms After Use?
We store pom poms by gently fluffing them, then placing them in a large box or hanging them in a closet. Keeping them away from moisture and crushing helps us keep their shape for future use.
Are Tissue Paper Pom Poms Safe for Outdoor Decorations?
Tissue paper pom poms aren’t waterproof, aren’t windproof, and aren’t sunproof. So, we don’t recommend using them outdoors unless it’s a calm, dry day. Let’s keep them safe, bright, and beautiful inside instead!
Can I Make Pom Poms Using Other Materials Besides Tissue Paper?
Yes, we can definitely make pom poms using materials like fabric, crepe paper, or even yarn. Each gives a unique texture and durability, so let’s experiment with different options to find what suits our decorating needs best!